Saturday, July 01, 2006
A simple cost effective way to build stable furniture without the need of specialized wood worker's skills.Cheap and Stable
This chair costs less than 15 Euros. The seated position is adjustable in a range from 30 cm until 80 cmand it can be build using regular home worker tools. A jigsaw and a router can be handy but are not really necessary. The use of a power sander or a portable planer can speed up things enormously. |
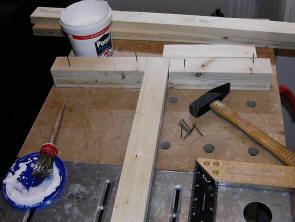
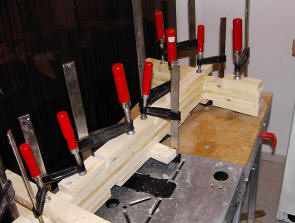
The roof batten systemThe cheapest wood available is the so called roof batten which is a blunt plank of common spruce typically 2,5 x 4 x 200 cm. I just layered multiple battens in order to build an amazingly strong construction. The first layer of planks is layed out on the table, wood-glue is applied and the second layer is nailed on top of the first layer. The same procedure is used for the third layer:
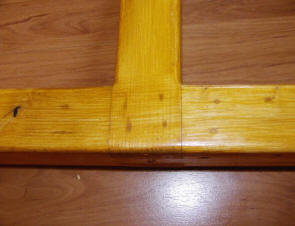
All surfaces are smoothed using router and power sander. Note the filled nail holes of the last layer:
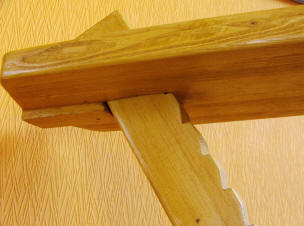
This T-joint looks nice and is very strong:
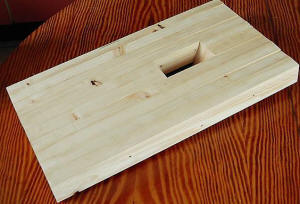
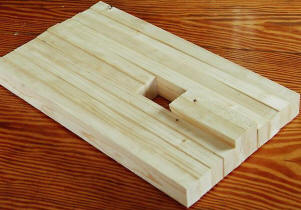
The seatI used the same layered batten system. The seat counts 10 layers. Each batten is positioned in a way that the direction of the growth rings alternate, doing so will avoid distortion caused by shrinkage movement.
Layer 5 and layer 6 consist of 2 battens each. The smallest are cut under an angle, all other are rougly planed down to about 3 cm thickness using a power planer:
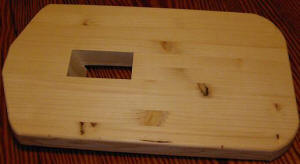
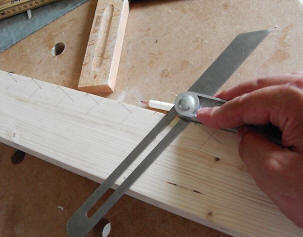
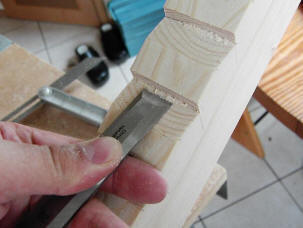
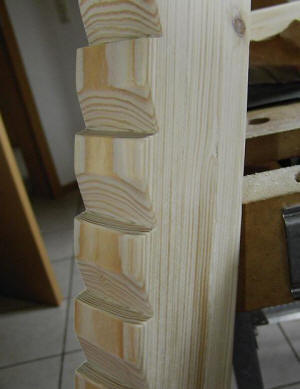
The teethI copied the angle for the teeth from my child's chair, that angle measures about 20 degrees. I wanted one teeth per 4 cm resulting in 15 levels. It turned out that I don't really need 15 levels during observation, 10 levels would have been okay.
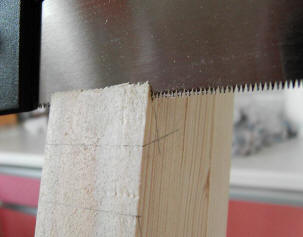
Of course, I could have used any saw but I used a Japanese hand saw to cut the teeth. Japanese saws cut on the pull stroke, so the blades are much thinner. As a result, they cut a narrow kerf with no tearing of the grain. Unfortunately, Japanese saws are expensive.
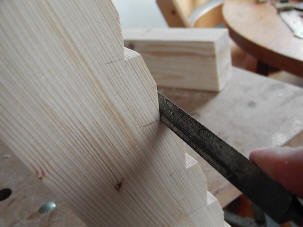
Finishing the teeth:
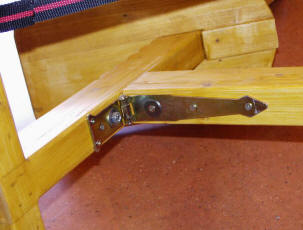
The assemblyAn hinge keeps the whole thing together. An M8 carriage bold keeps the hinge in place. The chair is foldable and fits on the back seat of my car.
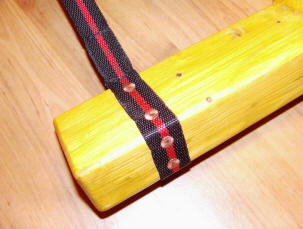
An additional belt between the feet prevents the hinge from being destroyed by overload:
At the end, varnish was applied:
|